A complete guide to Adobe Marketo Dynamic Chat

A complete guide to Adobe Marketo Dynamic Chat

Users today want everything to be fast, whether it's getting their queries answered or diving straight into product/service specifics to understand if it solves their pain points. Traditionally, they had to rely on automated voice instructions to experience the luxury of talking to a human agent about their issues or queries. But not anymore, thanks to the evolving technologies like artificial intelligence and machine learning. Now, customers can simply head over to the chat section of a digital product, preferably on their smartphones and get all the desired information they expect. 

While the experience might seem seamless and almost human-like, the backend is governed by robust and powerful conversational AI tools like Adobe Marketo Dynamic Chat that serves dual purpose for brands:

  1. Help brands to always have an agent round-the-clock to ensure no human question goes unanswered, thus boosting conversions
  2. Provide customers the solutions they need, the satisfaction they deserve, and the experience they desire 

A powerful inclusion to a brand’s cross-channel strategy, Dynamic Chat Marketo engages with your website visitors based on their preferences and content browsed, and results in a king-size engagement. In this blog, we’ll educate you on this powerful AI chatbot from Adobe, how one can implement it, and conclude all the insights you must know before going ahead with it. 

Conversations that result in conversions: Introducing Dynamic Chat Marketo Engage

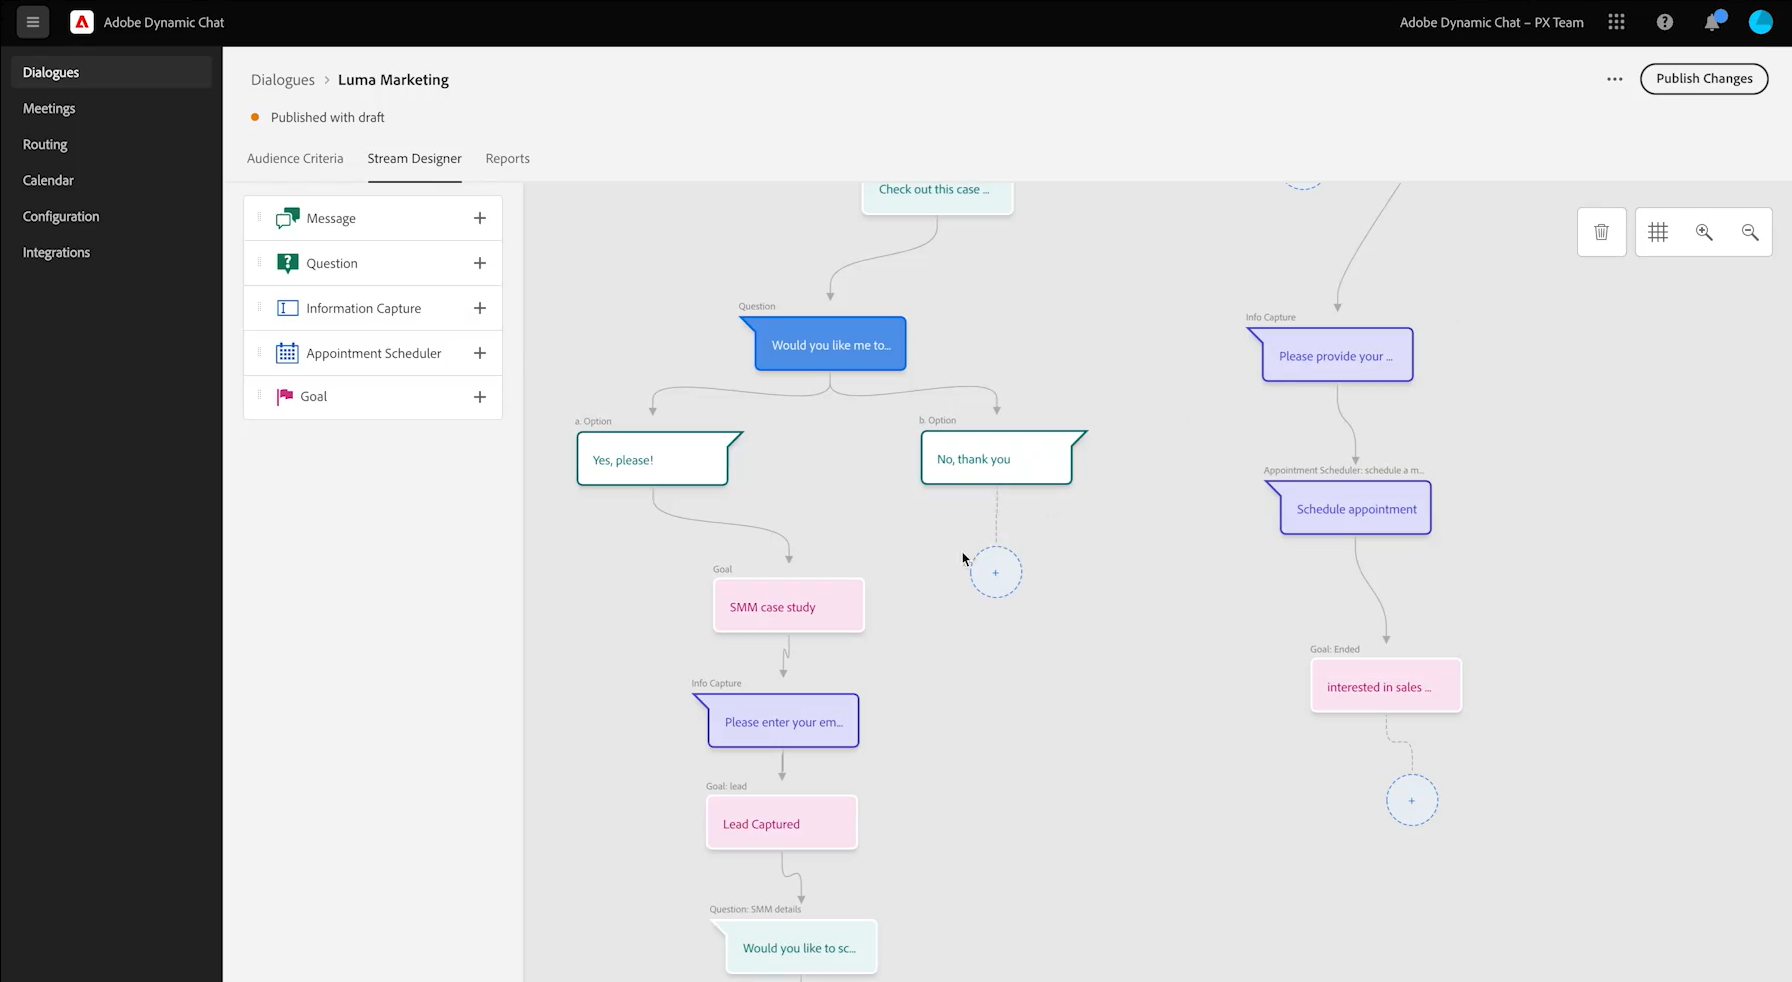
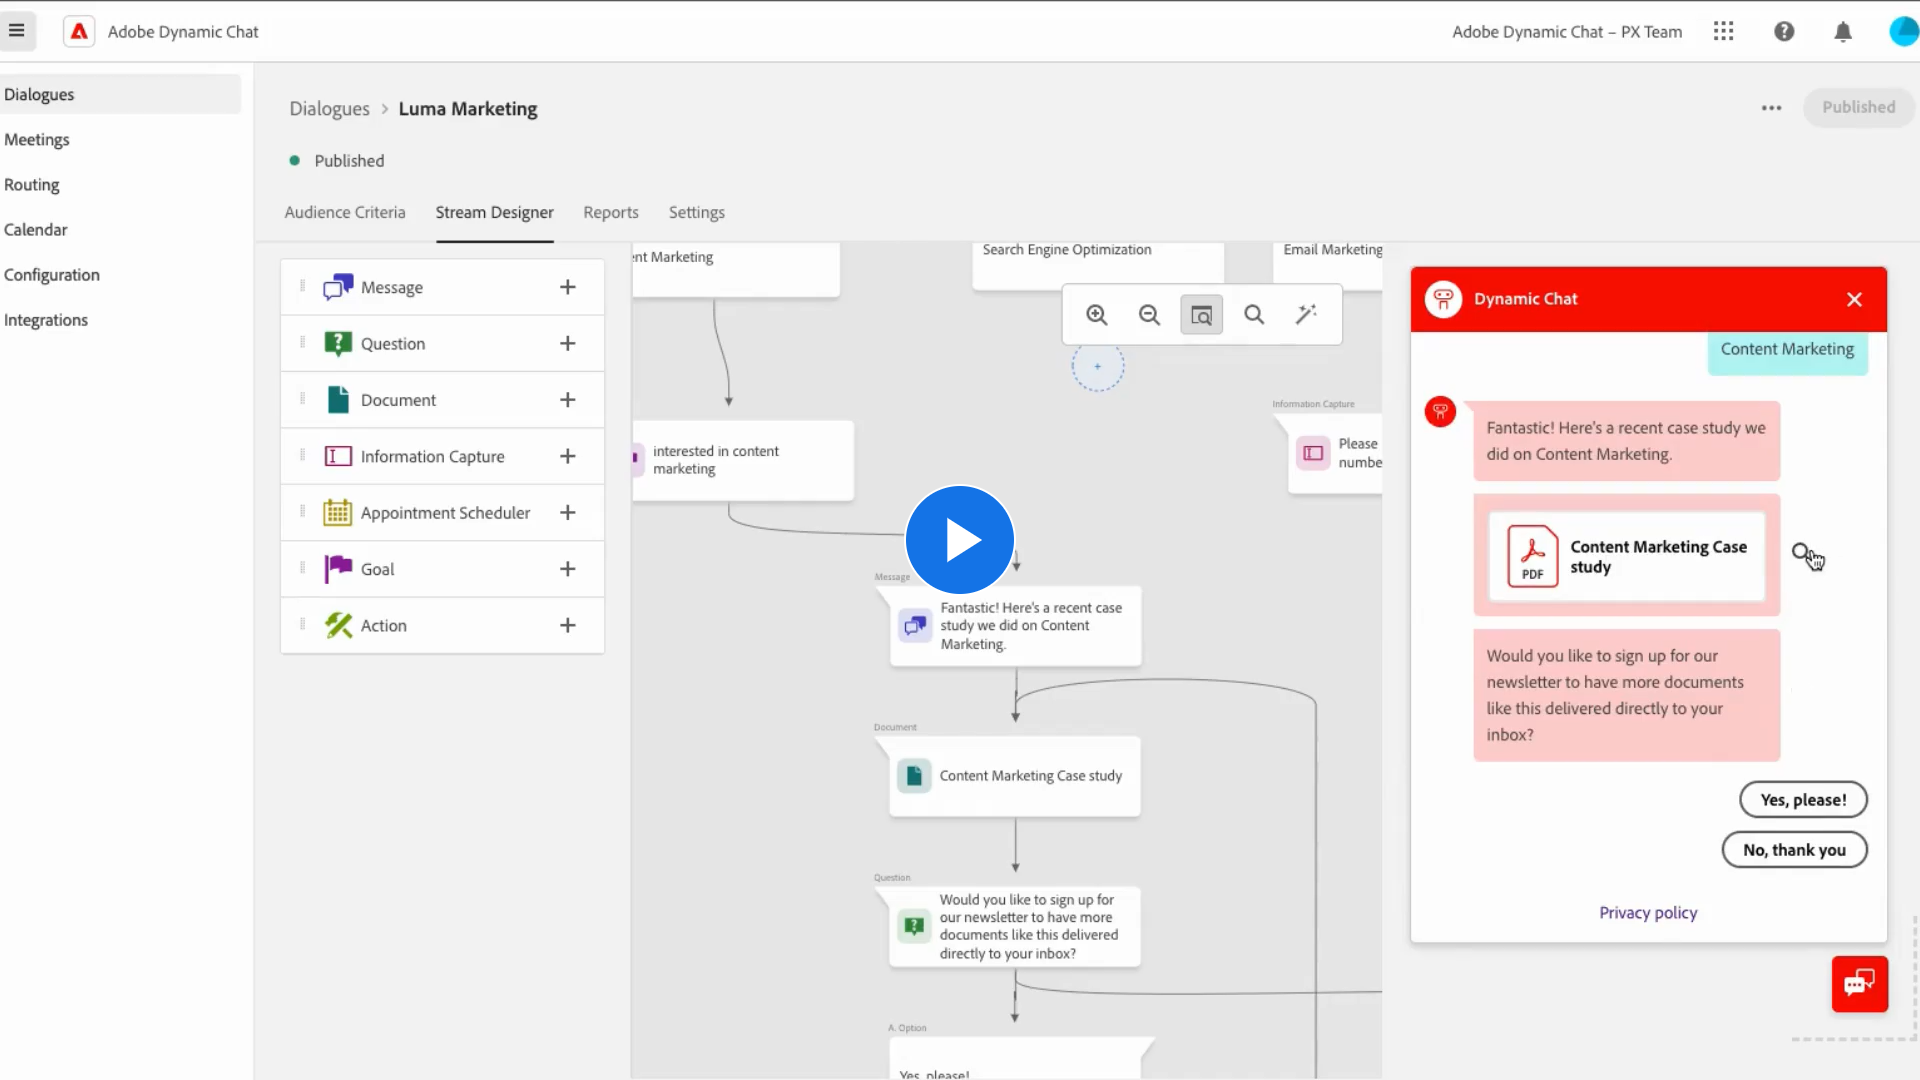
Dynamic chat is a chatbot solution from Adobe that allows brands to create unique contextual experiences for every web visitor. It natively integrates with Adobe Marketo Engage, a next-gen marketing automation platform, and thus allows brands to easily run cross-channel communications with users. A superbly handy tool for marketing and sales people, Adobe Marketo Dynamic Chat lets you engage web visitors quickly and design conversations based on every user’s interest, search histories, and preferred products/services. 

Some points to note are:

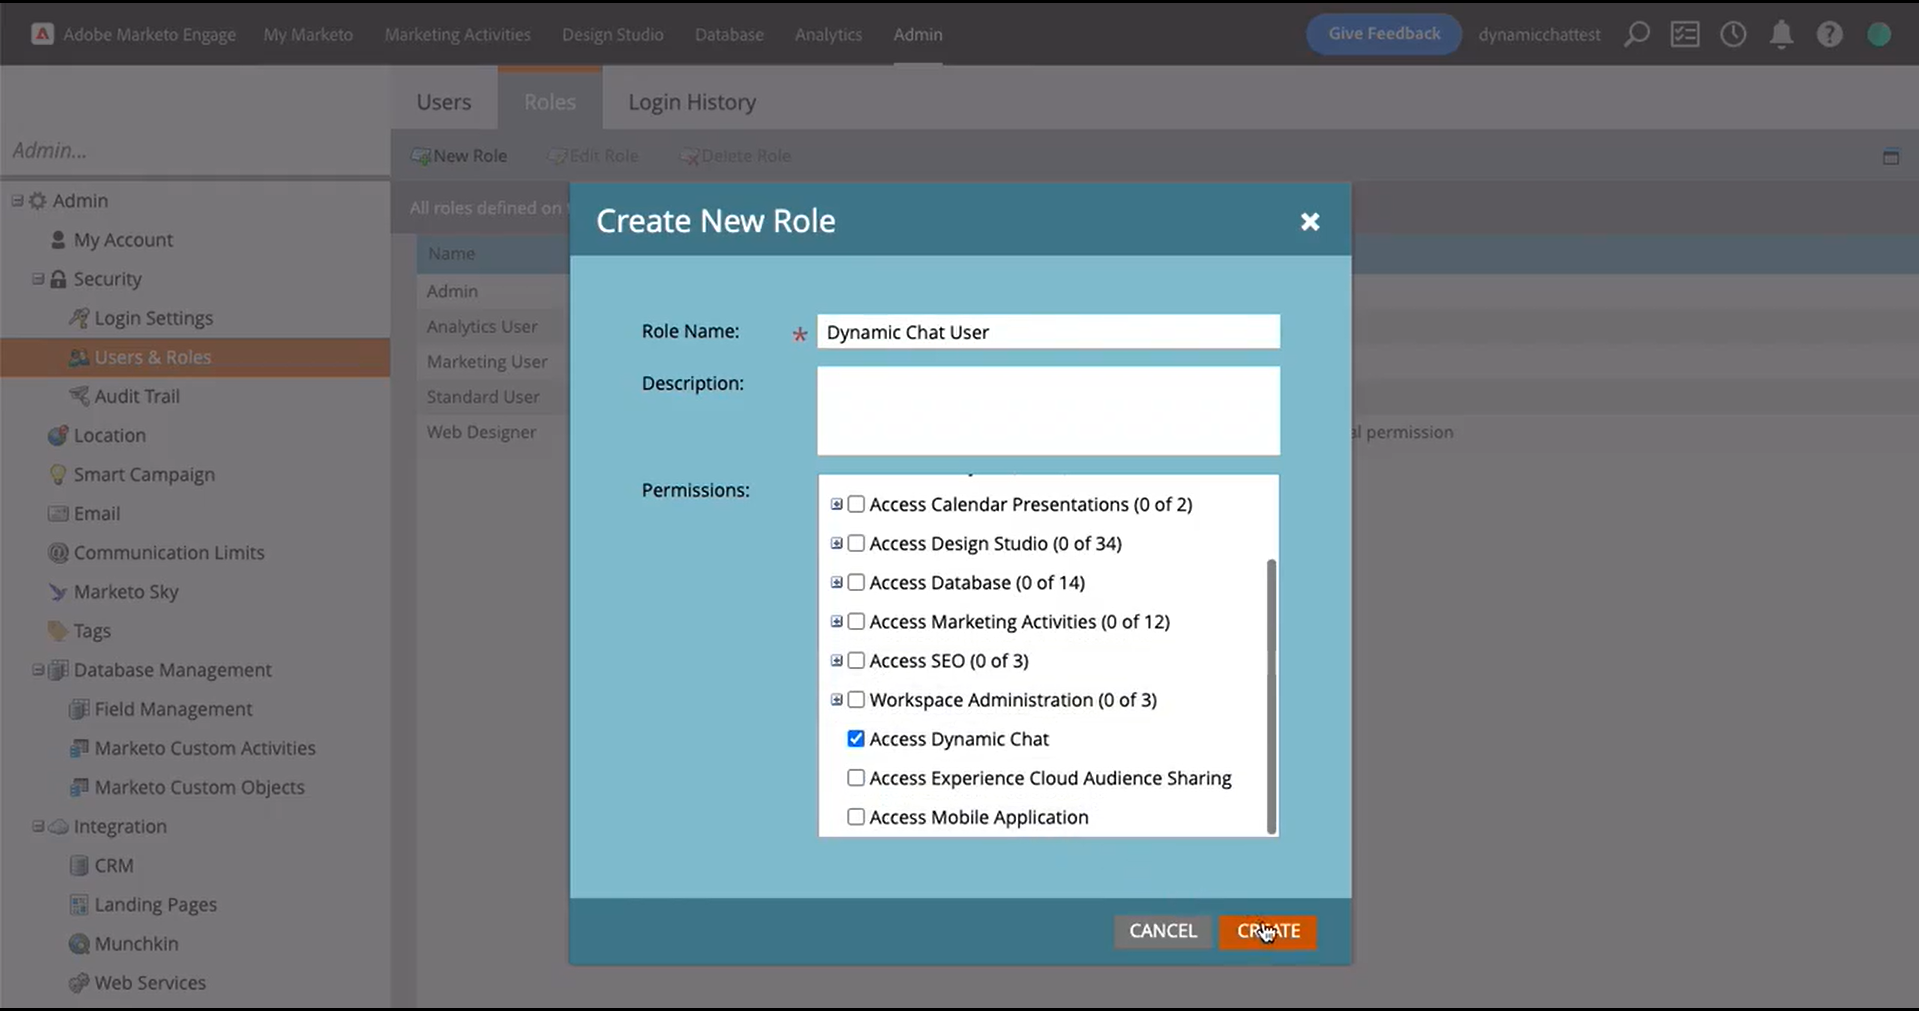
  1. The tile Dynamic Chat is already added to your Adobe Marketo Engage homepage.
  2. In case you wish not to show the tile to everyone, Adobe has added another role called, ‘Access Dynamic Chat’, for admins to enable or disable it for their team members.
  3. All users acquired by Dynamic Chat will have their Person Source as dynamicChat.
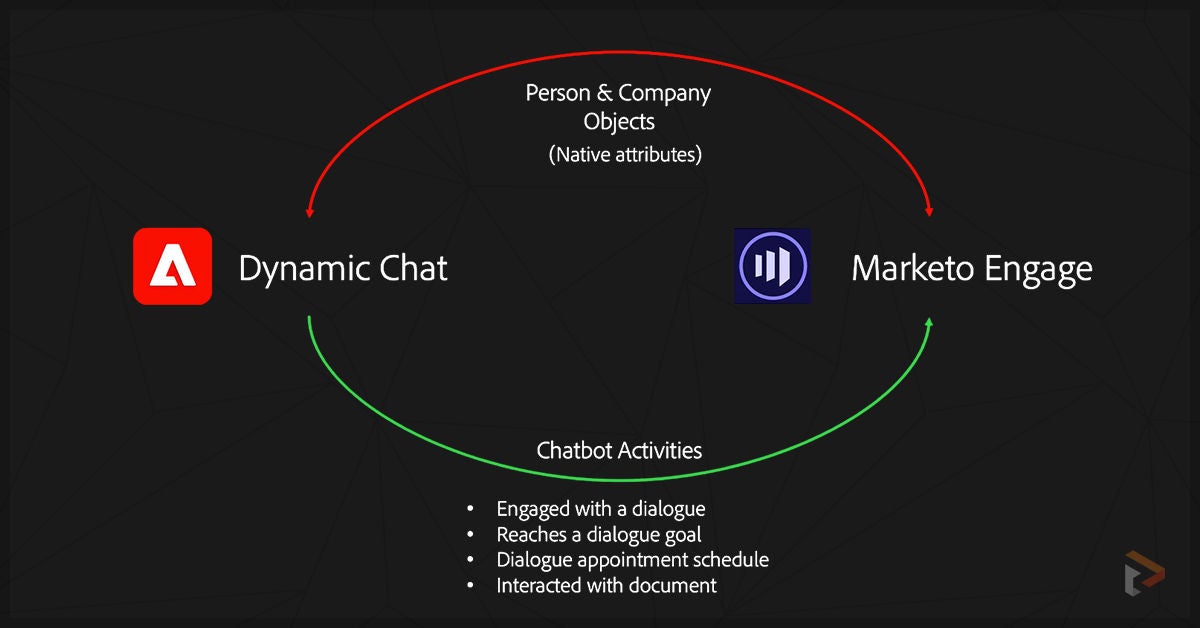
  4. Adobe has also introduced new activities to define the interaction a visitor has with the chatbot. These include Dialogue Engaged, Dialogue Goal Reached, and Dialogue Appointment Scheduled, visible in the activity log of a lead. 
  5. There are new filters and triggers introduced for designing smart campaigns to decide the further actions or lead score of a visitor.
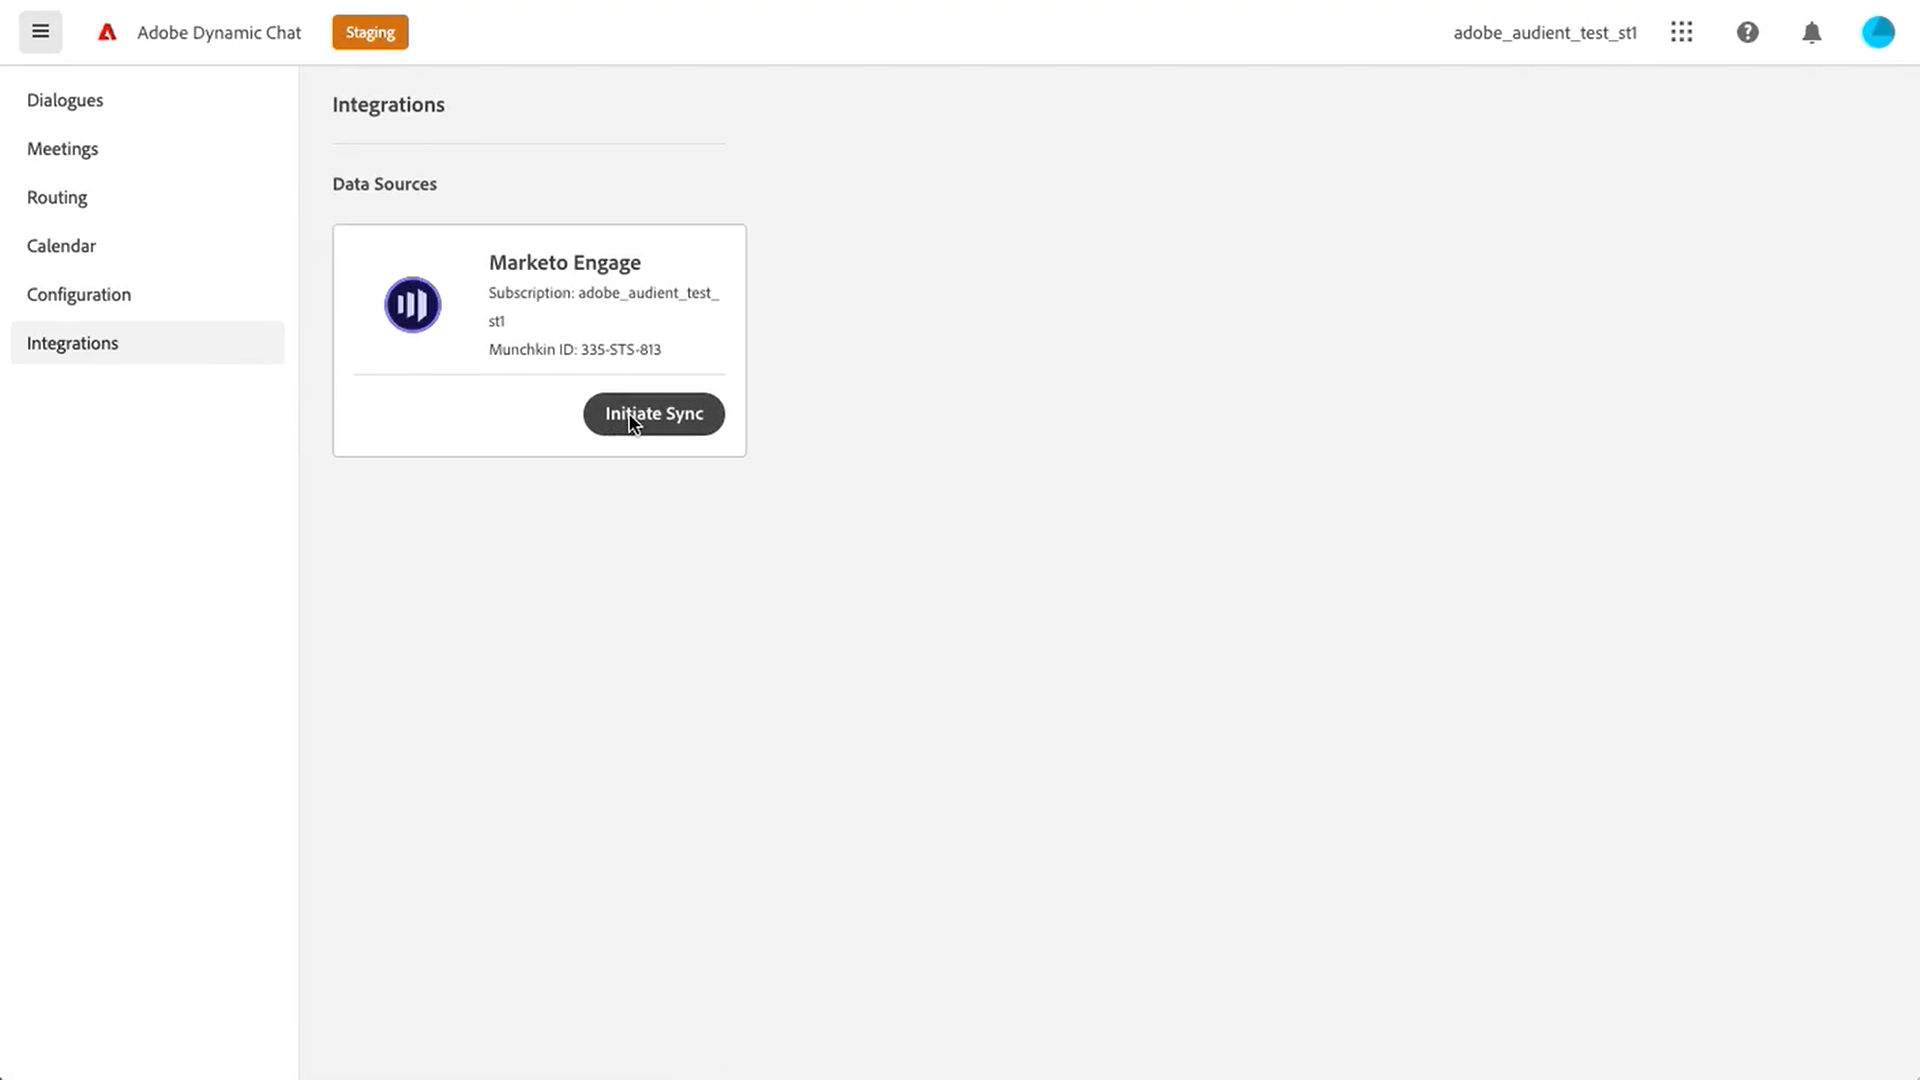
  6. The inferred attributes are collected by the Dynamic Chat Munchkin cookie which is the same as the Adobe Marketo Munchkin cookie ( as both leverage a native integration). Therefore, when a new lead is created via Dynamic Chat dialogue, the inferred attribute collected by the cookie is simply passed to the lead record in the Marketo database. 

“Check out our blog on how Adobe Marketo accomplishes the marketing automation trends for 2023 here.”

The six modules of Adobe Marketo Dynamic Chat

The six modules of Adobe Marketo Dynamic Chat

The following are some modules present in Dynamic Chat Marketo chatbot. Let’s go through them:

#1: Dialogues

Just like its usual meaning, these are conversations that the chatbot has with a visitor. It serves these important Ws, which are:

  • WHERE: This specifies the different web pages where you want the dynamic chatbot to appear. You can add multiple target URLs to denote the ‘where’. 
  • WHO: This is where you build a persona of visitors you would like to have this conversation with. You can add as many available inferred, person and company attributes as you want to build your user persona for this dialogue. 
  • WHAT: This is where you dive into the actual conversation you would like the chatbot you have with a specific visitor. You can design the entire conversation via Stream Designer via simple drag-and-drop actions without writing a single line of code. You can add tokens (to personalize messages) and add emojis to make the conversation fun.

Available cards in the dialogue module

There are various cards available in the Dialogue > Stream Designer section of the Dynamic Chat, namely, Messages, Questions, Information Capture. Appointment Scheduler, and Goal.  You can even map user responses to an existing attribute in the Marketo database. While the other cards are self-explanatory, Goal here specifies an important marketing touchpoint and used further for lead qualification. You can even create new goals or use the existing goals. 

Dialogue Reports: What can you track?

Another important functionality of the Dialogue section is Reports, where you can see 

  • Number of times the chatbot is triggered
  • How many visitors were engaged
  • Total completed conversations
  • People acquired
  • Meetings booked
  • Goals achieved

The available dialogue templates

When creating a dialogue, you can either choose from the available templates for blog reader conversion, lead qualification, lead generation or event registration. Or, you can go with a blank custom dialogue as per your needs. 

Implementing real-time changes to your dialogue content

When previewing your dialogue via the Preview Toggle in the Stream Designer card of Dialogue module, if you find something is entered incorrectly or to you wish to change the dialogue content, you can simply click on the magnifying glass against the response under Preview and it will take you to the dialogue in  the tree. 

Implementing real-time changes to your dialogue content

#2: Meetings

This module details the total meetings that were booked by visitors with your sales/marketing representatives. Information like the Agent name the meeting is scheduled with, the current status of the meeting, the tentative meeting date, the dialogue that resulted in the meeting, and the date and time the meeting was created on is available.

#3: Calendar

This module allows all Dynamic Chat users from sales and marketing teams to integrate their Microsoft Outlook and Google calendars. So, when a visitor opts for meeting booking, Marketo fetches the agent’s available time slot and displays it. 

#4: Routing

A noteworthy aspect of Dynamic Chat Marketo Engage is multi-user availability. You can ask as many sales and marketing people to integrate their calendars to the Adobe chatbot, which will then be employed by the Routing module. 

Routing is where you set up the order in which your sales representatives’ calendar will be shown to a visitor, and also create custom routing rules. Adobe Marketo Dynamic Chat then displays these calendars in a round robin fashion when a user asks for the meeting widget. 

#5: Configuration

It is only natural for you to customize the look and feel of the AI chatbot to your brand’s identity. And the configuration module is where you can achieve that. From colors, fonts and font sizes to your chatbot’s name and its avatar (or upload a custom avatar) along with the privacy policy settings, all of this can be adapted to your brand’s image. 

The configuration module also governs Dynamic Chat’s installation. Here is a JavaScript snippet available that you have to copy and paste on the webpage where you want the chatbot to pop-up. 

#5: Integration 

Dynamic Chat Integration

Adobe Marketo natively integrates with Dynamic Chat; however, the first time you visit this module, it’ll ask you to enable the sync. Once completed, all the leads that will be captured via Dynamic Chat will be pushed to Marketo in near real-time and vice-versa. The sync takes around 24 hours to complete, post which you can publish the dialogues and empower your visitors to have personalized conversations with your chatbot.

Setting up and installing Adobe Marketo Dynamic Chat 

Setting up and installing Adobe Marketo Dynamic Chat

Here are the steps to set up and install Dynamic Chat:

  1. As mentioned above, to setup and install the chatbot to your Adobe Marketo instance, you need to initiate sync from the Integrations module. Once you do so, you can select up to 50 native and custom fields from your Marketo instance to sync with Dynamic Chat. 
  2. Now, you need to style your chatbot to make it brand-relevant. You can do so from the Configuration > Style section. 
  3. Install the JS script snippet from the Configuration > Installation section to the HTML of all those webpages where you want to display the chatbot. 
  4. You can install the chatbot to any Marketo-hosted landing page by simply adding the JS script to Landing Page Actions > Edit Page Meta Tags > Custom Head HTML.
  5. All that’s left now is the designing of your Dialogue. 

Managing users on Adobe Marketo Dynamic Chat

Before you can start using Dynamic Chat Marketo, you need to first provide access to your marketing and sales users. To do so, follow these steps:

  1. Visit https://adminconsole.adobe.com/
  2. Click on ‘Add Users’, enter the email of the user you wish to add, select the product you wish to provide access to, and click on save. 
  3. The user would receive the invitation for Adobe Marketo Dynamic Chat account creation. 
  4. Next, head over the Admin section of your Marketo instance, to create a new role for the access to Dynamic Chat.  
Managing users on Adobe Marketo Dynamic Chat

          5. Now, assign all users to the role whom you previously invited in the Adobe Admin Console. 

          6. Once, users have logged in, they will be able to see the Dynamic Chat tile in the Marketo homepage 

PS: If you wish to remove a user, head over to User, select the user you wish to remove, and delete the user. 

Powerful 2022-2023 releases of Adobe Marketo Dynamic Chat 

Adobe Marketo releases several updates and additions to the tool regularly. Here are some important ones:

  1. Picklist support for Information Capture card in Dialogue module: Dynamic Chat now offers picklist where a visitor can choose from up to 250 choices. For example, you can now add a picklist for a dialogue that asks for the job title of a visitor. 
  2. Date and DateTime fields for Information Capture card in Dialogue module: For dialogues that show a calendar and require a visitor to select a date and time, Adobe Marketo Dynamic Chat now offers select and sync of date and datetime attributes. 
  3. A separate email notification for booked meetings: The latest Jan 2023 update also includes a separate email notification for the meeting booked along with all the necessary details, such as, invitee name, invitee email, event date/time, dialogue URL, and all the attributes captured. 
  4. Personalize your booking emails with tokens: During instances where a visitor requests for a meeting with your sales rep, you will send a confirmation email. In the recent release, you can now personalize the email with lead and company tokens. 
  5. Support for boolean field types: It now syncs and captures boolean data field types into Dynamic Chat from Marketo. In the Map To Response section of Information Module > Dialogue, you can add data types with field names where it auto-populates responses like Yes and No to the visitor. 
  6. Submit button for Information Capture card: For visitors who couldn’t figure out whether to press enter or submit for a Information Capture card dialogue, Adobe Marketo has now added a submit button to make it easy. 
  7. Prevent accidental deletion of dialogues: In cases where a user mistakenly deleted a dialogue, thus removing all the set up campaign triggers and filters, Adobe Marketo will now show all Programs, Smart Lists or Static Lists using the dialogue, so as to update the campaigns before deleting the dialogue.  
  8. Meeting buffer extended to 30 minutes: The default buffer time between two meetings for a sales rep has been changed from 60 to 30 minutes to allow for more bookings. 
  9. Skip or overwrite value already provided by a visitor: Several times, a visitor was asked the same information even if they have provided the same previously. However, now in Stream Designer > Information Capture card, you can now choose to  either skip if the value is already in the database or overwrite existing value. This way, the chatbot will skip to the next dialogue if the database already has a lead’s information. 
  10. Disconnected dialogues notification: For dialogues that appear disconnected in the stream designer, they will now be highlighted so that you can update their hierarchy in the chat. 
  11. Poke messages only on desktop: As poke messages take a lot of screen space, Adobe Marketo has now disabled them for smaller screens and will only be visible on desktop screens. 

Make cross-channel marketing seamless with Adobe Marketo Dynamic Chat

Undeniably, Dynamic Chat Marketo Engage is one of the best available tools for conversational marketing. But that’s not this chatbot’s only beneficial attribute. Once you have all the information you need about a lead, you can use it to run cross-channel strategies across paid, web, social, and email channels based on lead and account targeting. You can even update lead scores, route leads based on their interactions, and also set up trigger campaigns to implement next steps based on chat history. 

Apart from this powerful AI chatbot capabilities, Adobe Marketo comes bearing several other ROI-driven functionalities to help you automate, accelerate, and transform the delivery of personalized and relevant experiences. As an Adobe Partner who works extensively with the MarTech platform and has gained several certifications and accomplishments with the tool, we can help you explore more around it. Book a consultation with our MarTech experts to understand how you can reap maximum benefits and ROI with Adobe Marketo Engage. 

Explore more about Adobe Marketo for your business

  • #DIGITAL COMMERCE
  • #DIGITAL EXPERIENCE
  • #ECOMMERCE
  • #SALESFORCE COMMERCE CLOUD

CONTACT US

Talk to our experts for more insights.

We would love to hear from you.


Please fill the form or send us an email at

sales@ranosys.com

en